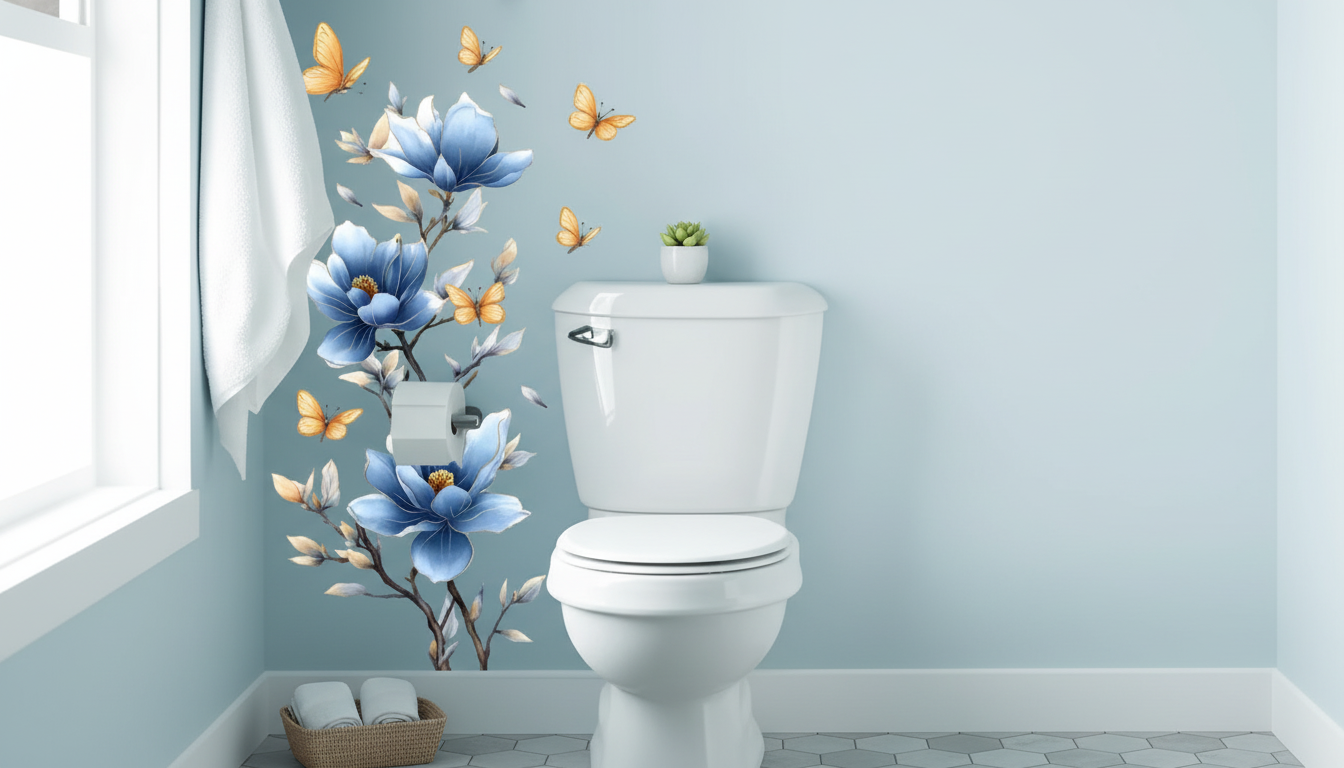
A floral butterfly wall decal adds color and movement without committing to paint or framed art. This blue floral design suits calm, nature-inspired spaces and works well for quick seasonal refreshes, kids’ rooms, rentals, and accent walls where a soft focal point is needed. The effect is especially pretty in bright rooms where natural light can catch the edges and create a gentle sense of depth. For more guidance, see Framed Farmhouse Bathroom Canvas Wall Art Country Butterfly ….
The difference between “cute” and “pulled together” usually comes down to a few styling choices that make the decal look intentional—like it belongs with the rest of the room. For further reading, see Little Lantern Floral.
Blue florals are flexible: calming enough for rest spaces, bright enough for high-traffic areas that need a little lift. A few placement ideas that tend to look “right” even in small rooms:
| Placement area | Recommended footprint | Spacing tip | Best companion decor |
|---|---|---|---|
| Above a queen headboard | About 2/3 the width of the headboard | Cluster center first, then add outward | Neutral bedding, one solid throw pillow color that matches the blue |
| Over a dresser | Slightly narrower than the dresser | Keep lowest edge 6–10 in above the top | Small lamp, tray, or vase to echo the floral theme |
| Next to a mirror | Vertical sweep from mid-mirror to above | Angle butterflies as if circling the mirror | Simple frame; avoid overly ornate patterns |
| Corner accent | Diagonal “flight” from lower corner to upper | Start dense at the corner, fade out | Plant or floor lamp to continue the upward line |
If you want an instant focal point that feels light (not heavy like a large frame), the Blue Floral Butterfly Wall Decal is an easy upgrade. The calm blue floral palette complements light neutrals, coastal tones, and modern cottage decor, and it can be styled as a single statement cluster or as part of a larger wall with botanical prints.
| Item | Price | Availability |
|---|---|---|
| Blue Floral Butterfly Wall Decal | $8.51 USD | In stock |
For a styled surface beneath your decal, a sculptural accent like the Modern Euro Ceramic Candle Holder can echo the soft curves of the butterfly wings without adding another pattern. If your butterflies are going in a powder room or vanity area (away from direct water), a bold contrast piece like the Modern Black Waterfall Glass Basin Faucet with Pop-Up Drain ties in beautifully with the “small touches of matte black” idea. And if you’re adjusting the wall decor around furniture and want a more balanced layout, the AI-Powered Solutions for Balanced Furniture Placement | 3-in-1 Bundle of Guides, eBooks, and Checklists can help you plan spacing so everything looks intentional.
Best results come from smooth, clean, dry surfaces. Light texture may work, but heavy texture can reduce adhesion and make edges lift.
Follow the paint manufacturer’s guidance; many recommend waiting until paint is fully cured rather than just dry to the touch to reduce the risk of peeling.
Peel slowly at a shallow angle, and warming the decal with low heat can help. Results depend on wall finish, paint condition, and how long the decal has been applied.


Leave a comment